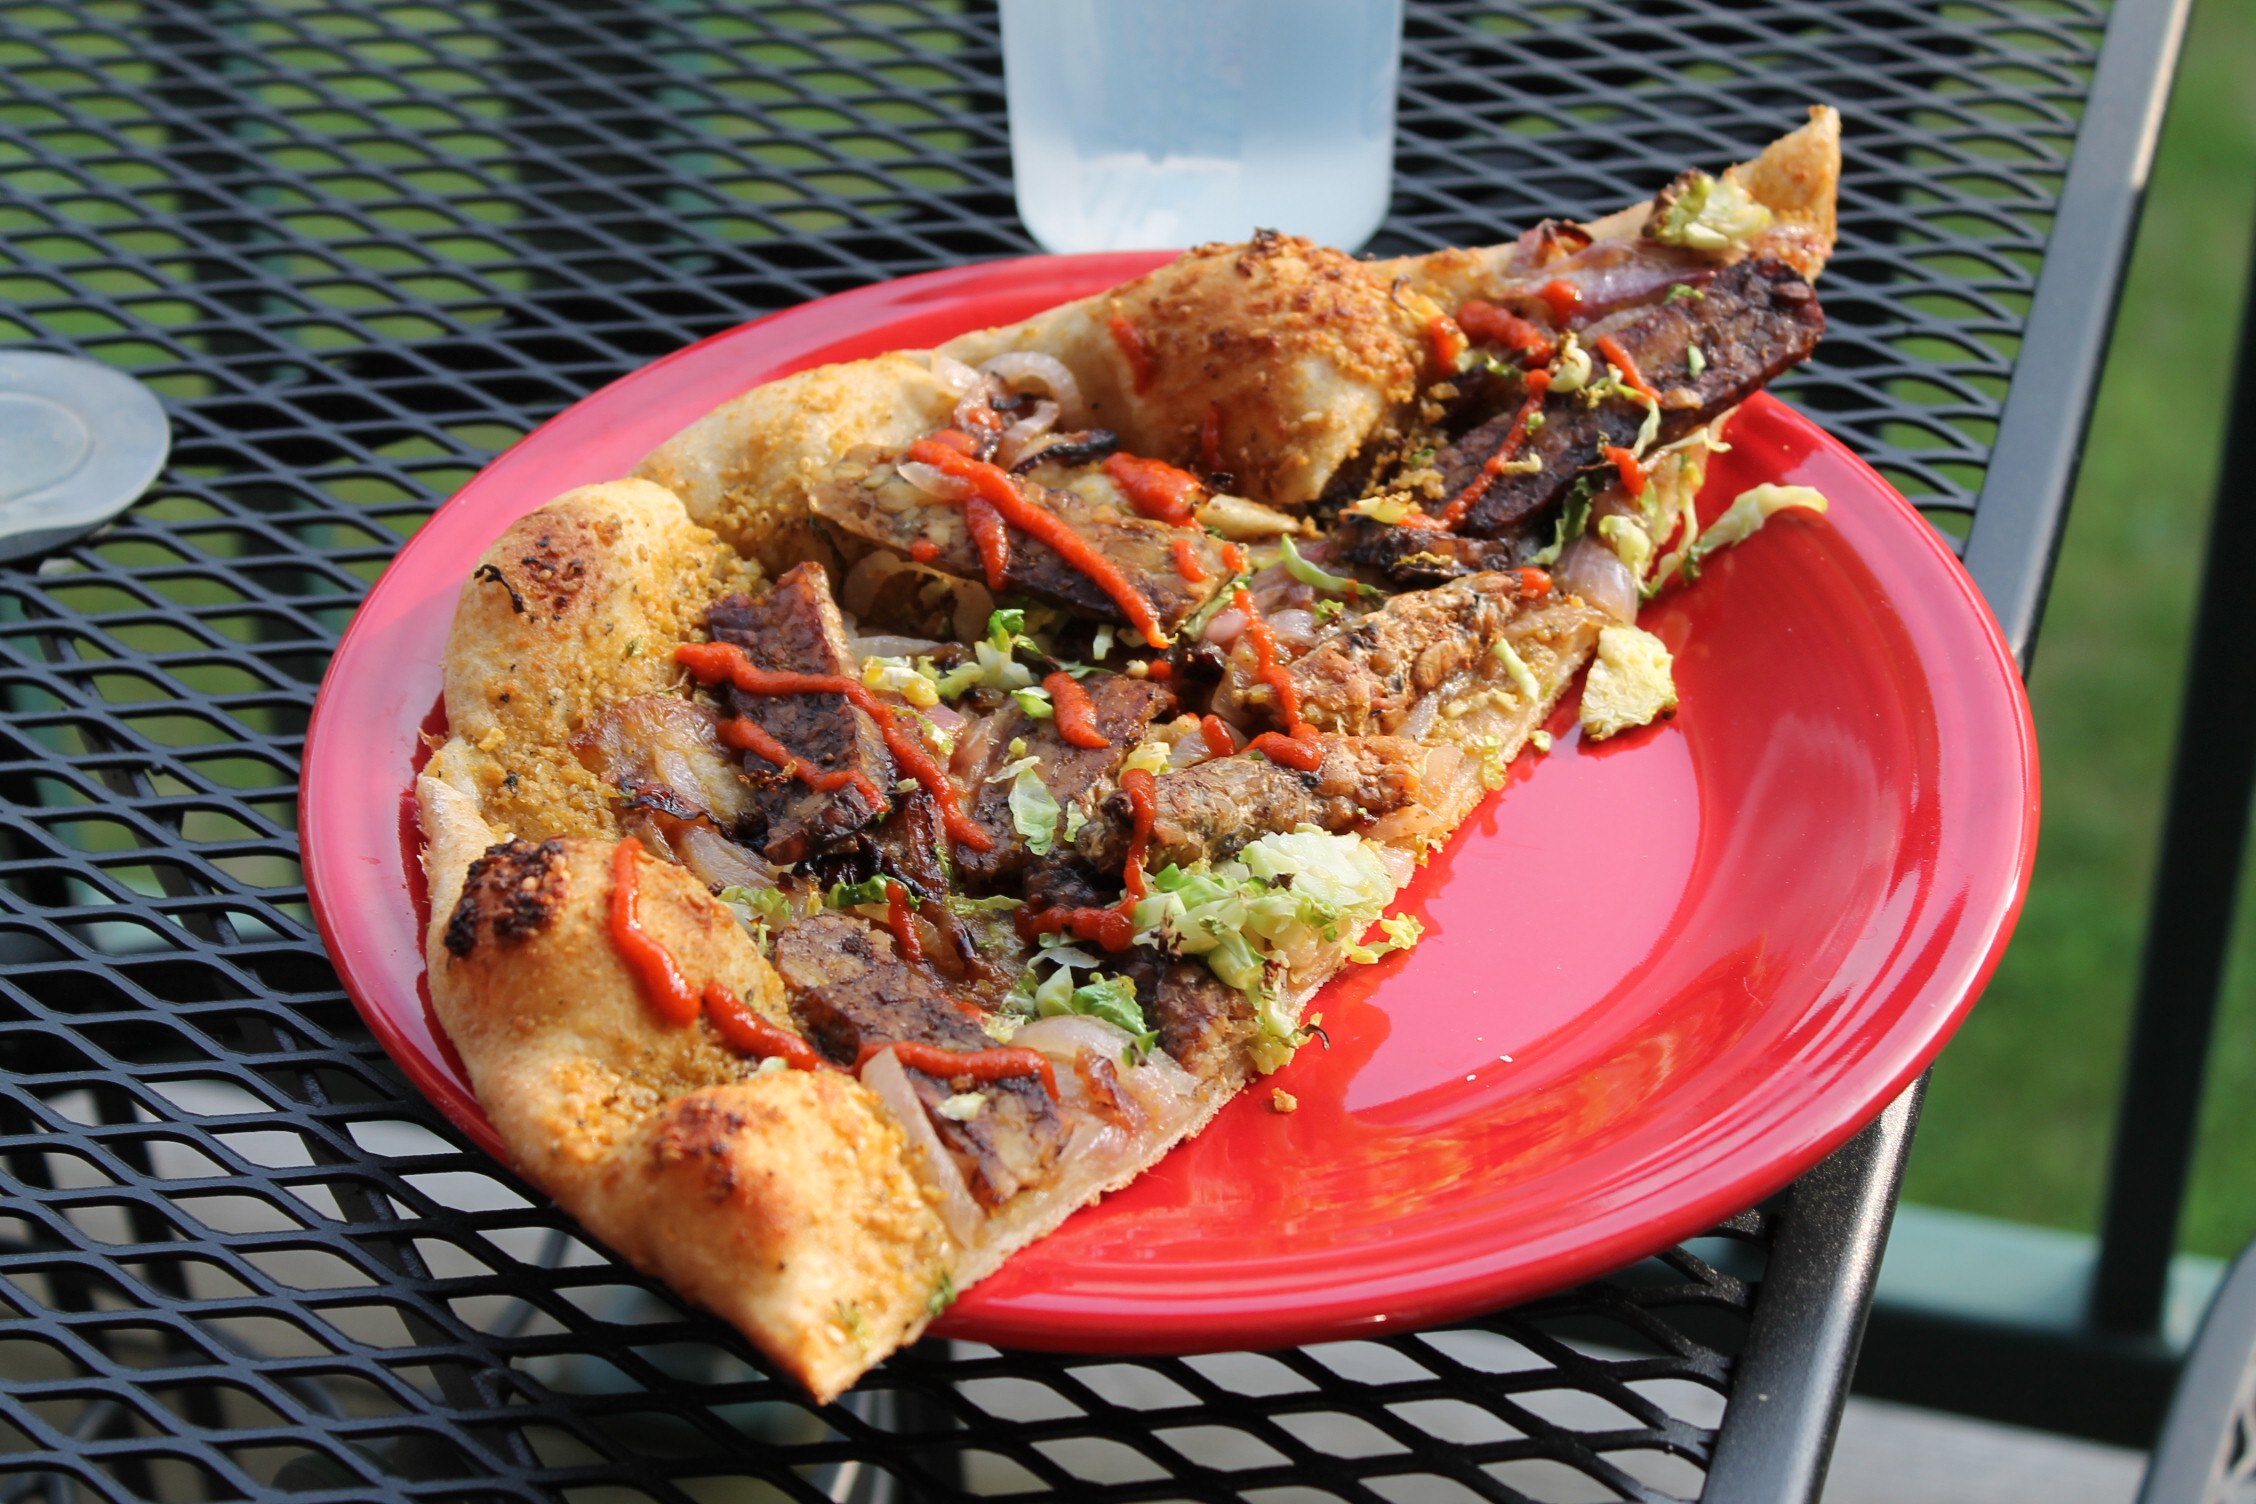
Preheat oven with a pizza stone to 550F; place pizza stone on the bottom shelf in the oven. Top the dough with the garlic sauce, caramelized onions, tempeh bacon and shredded Brussels. Bake for 8 minutes, until lightly browned. Remove from the oven and let sit for 2-3 minutes before cutting. Drizzle with sriracha if desired.
This upcoming weekend is a big weekend for Memorial Day BBQ’s and Parties so I have rounded up a few of my favorite recipes that would work really well for this weekend!
What are your plans for the weekend? Neil is running the two person relay of the Vermont City Marathon and then we are going to spend Monday celebrating our anniversary (a few days early) with massages at The Essex.
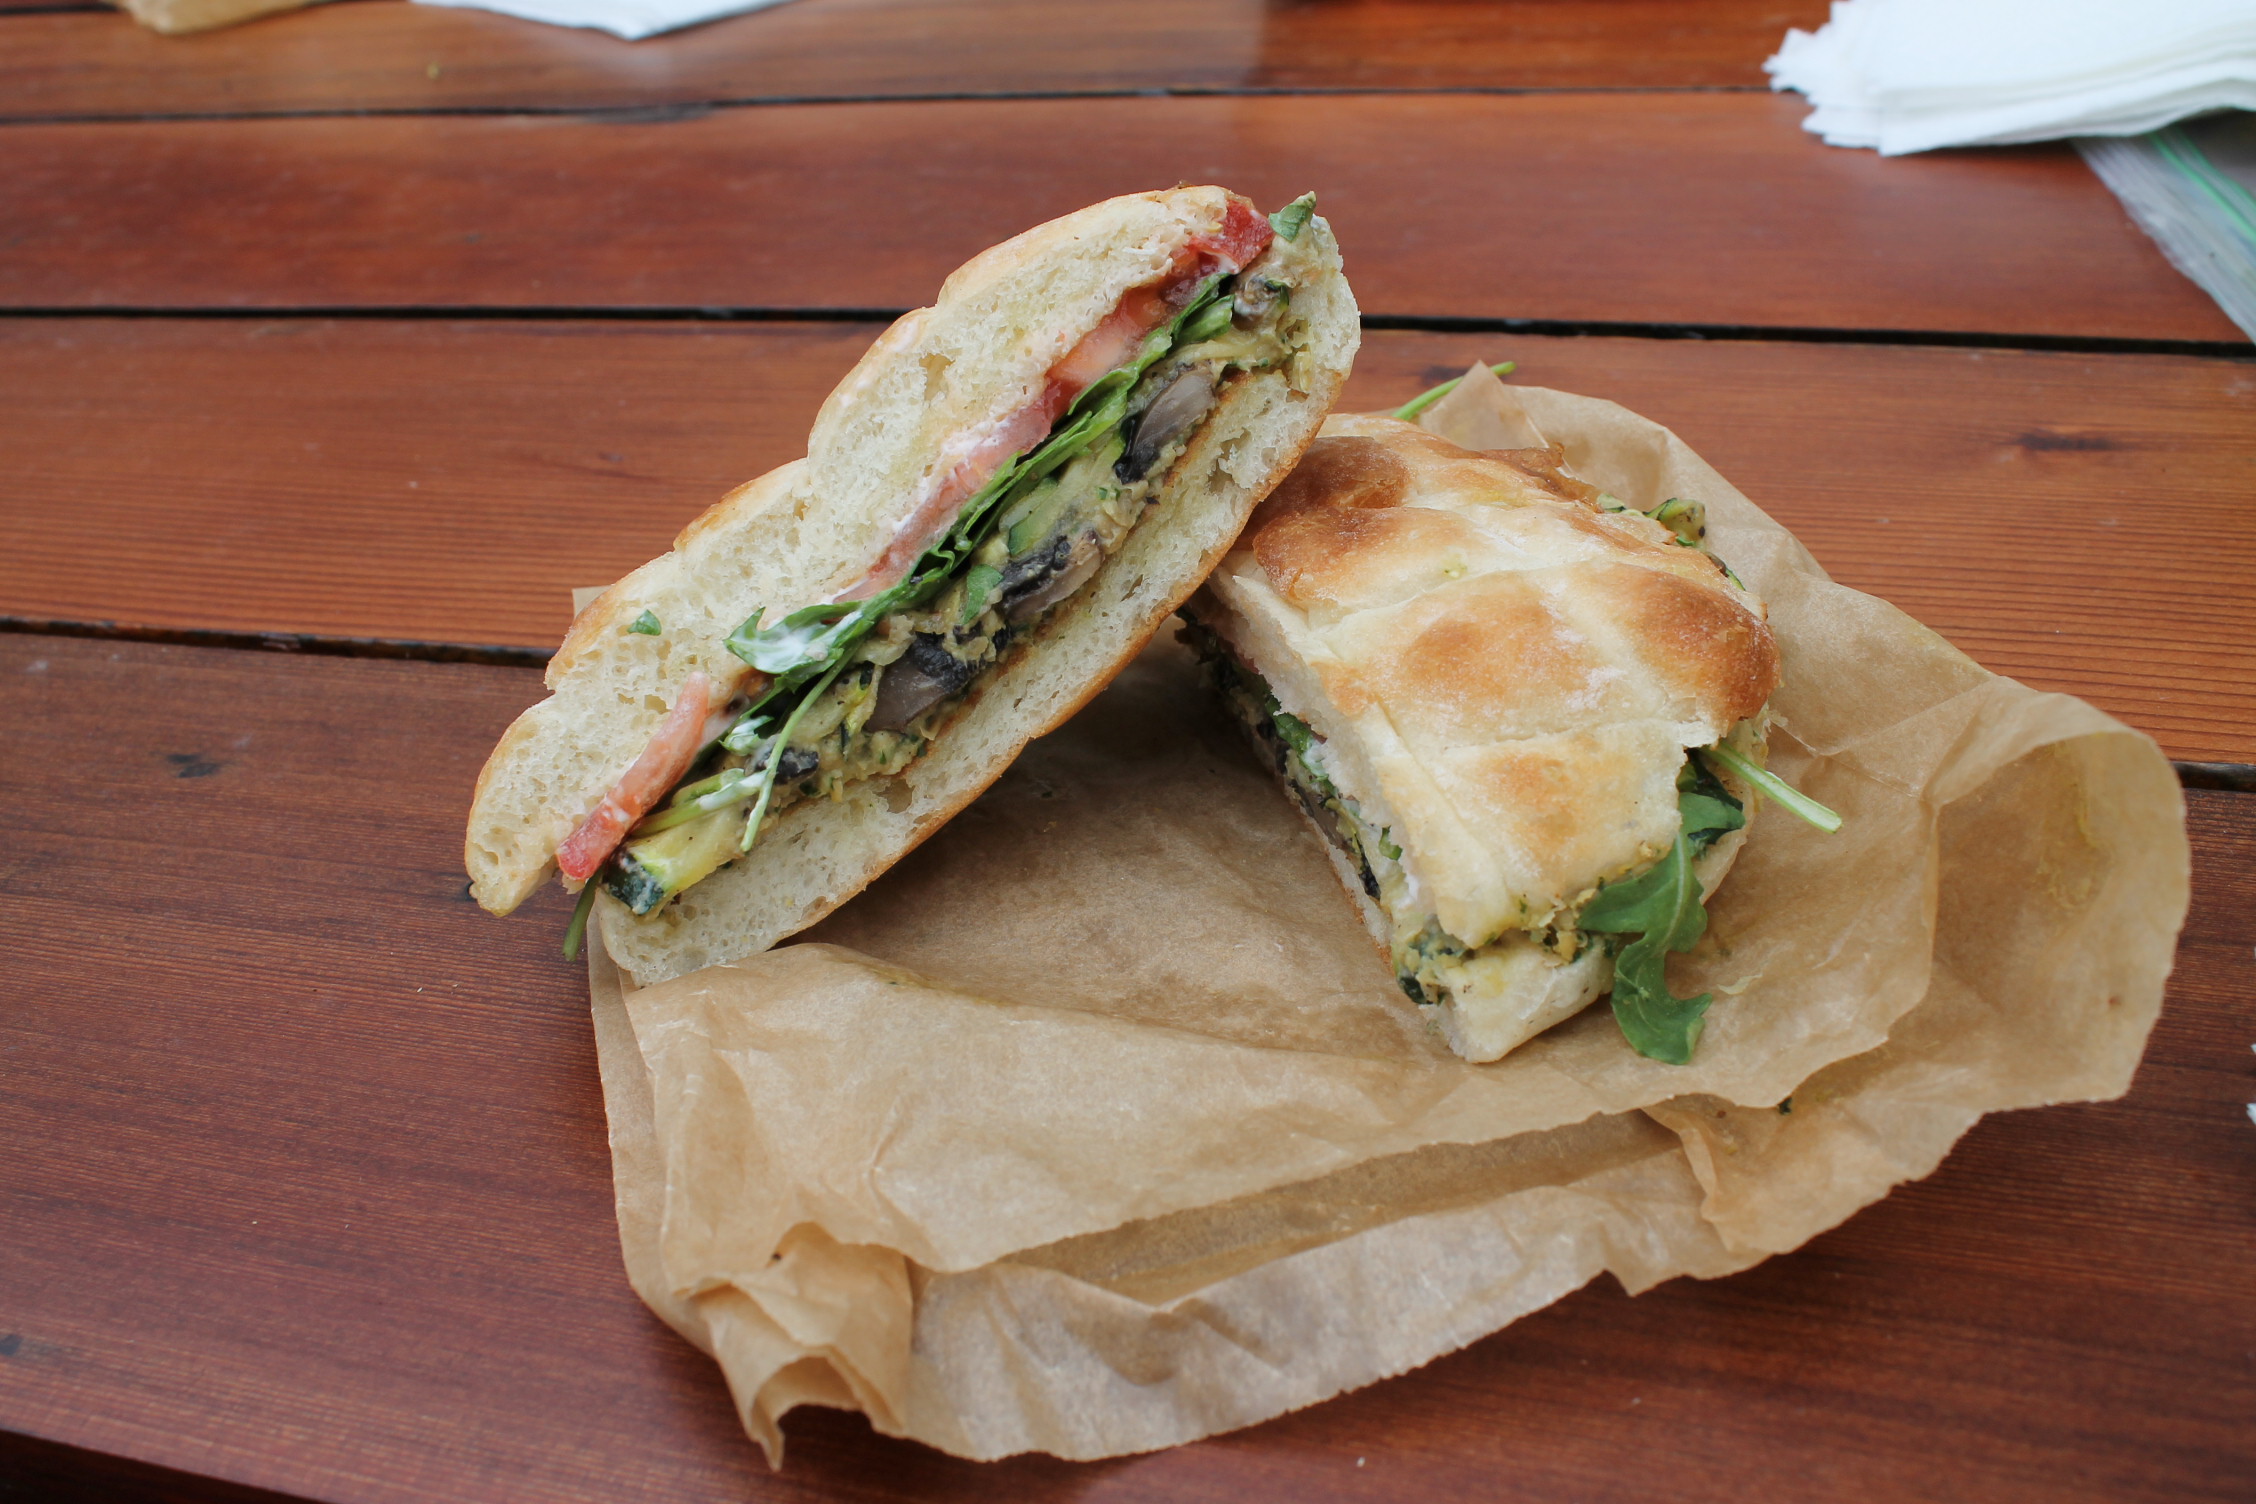
This past weekend we celebrated Mother’s Day at Shelburne Museum. Since the food choices are limited at the cafe there I made us a picnic lunch which included delicious veggie sandwiches with arugula pesto chickpea spread. I love how it turned out so I am sharing it with you!
3 garlic cloves
1/2 cup raw walnuts
1/4 cup nutritional yeast
2 cups lightly packed baby arugula
2 tablespoons olive oil
2 15-oz cans chickpeas, drained and rinsed
2 heaping tablespoons vegenaise (or you could use more olive oil if you would like)
3/4 teaspoon salt
1/2 teaspoon black pepper
Place the garlic, walnut and nutritional yeast in the base of a food processor and process until crumbly, about 20-30 seconds. Add the arugula and process for 30 seconds and then slowly pour the olive oil through the feed tube and process until smooth. Add the chickpeas, vegenaise, salt and pepper to the processor and process just until combined. If you would like it smoother feel free to process longer, I preferred to make mine a little chunky.
Serve: spread onto your favorite veggie sandwich (I made ours with roasted mushrooms, zucchini, fresh arugula and slices of tomato), stuff this spread into tomatoes <– amazing, enjoy with veggies, on top of a salad or in a wrap.
Ever since Neil received his two bread baking books at Christmas time he has been addicted to baking and it has been wonderful to have a baker in the house (I’m not really one). One thing we have been making lately are homemade pizzas but unfortunately we don’t have a baking stone so although the pizzas are tasty they just weren’t as crisp on the bottom as we would like. Finally last week I bit the bullet and bought Neil a new Emile Henry Baking Stone and as soon as it arrived we new we had to make pizza.
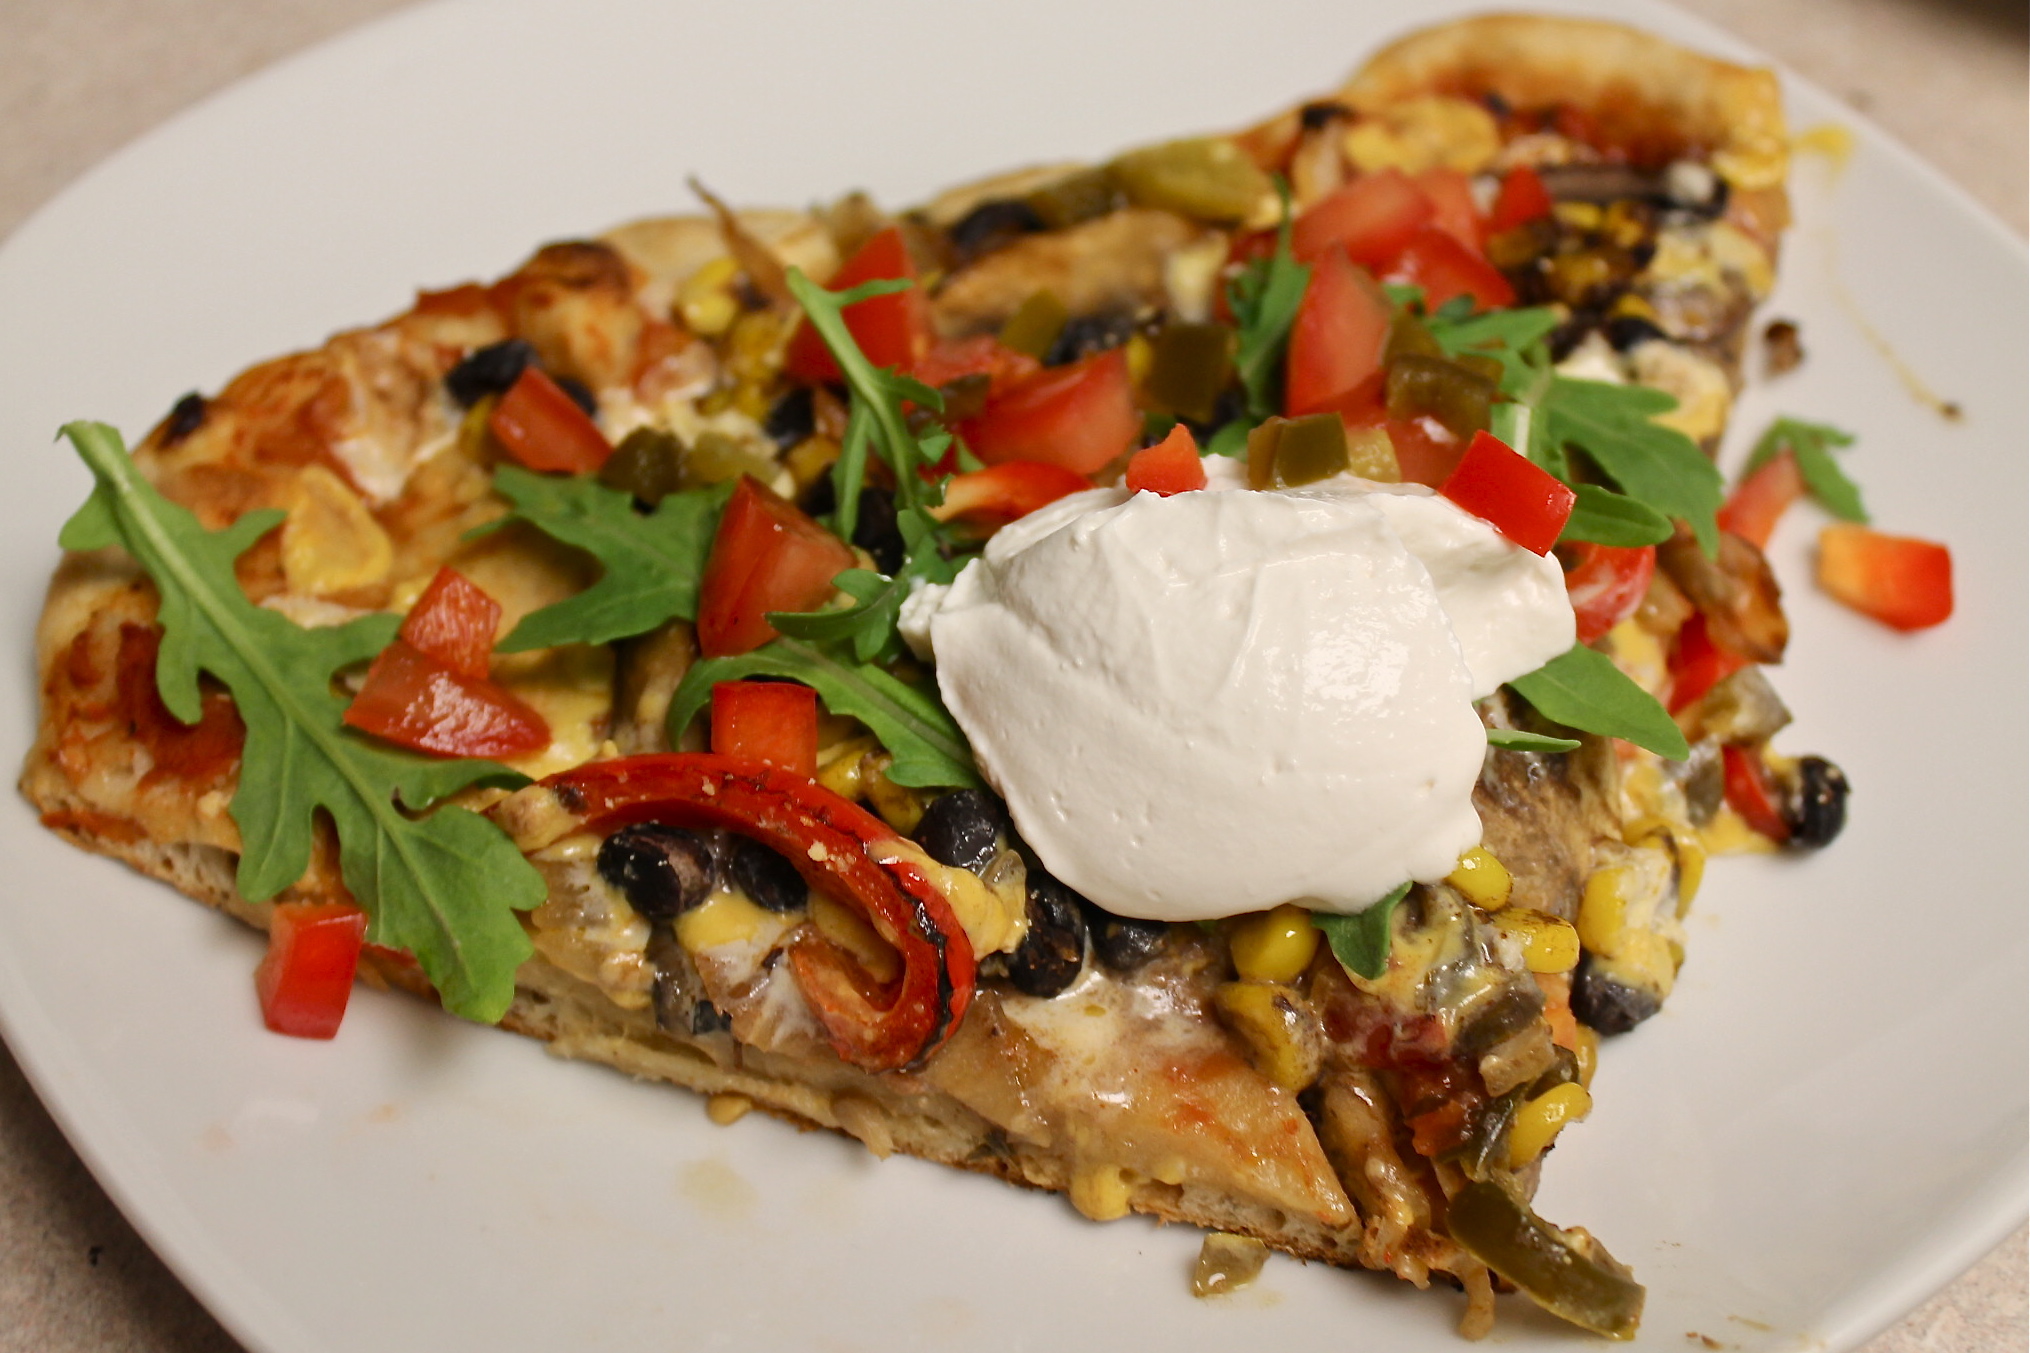
In honor of Cinco de Mayo we made a Mexican inspired pizza that was topped with Galaxy Foods new vegan Mexican Shreds (disclosure: I received the shreds free from the company to try out). I have to say I loved the shreds and the melted so well on the pizza. I am really weird about vegan cheeses and although Daiya, Cheezly and Sheese are all okay I’m still not much of a fan and often just make my own cheese sauces via nutritional yeast and nuts. Galaxy Foods has been the only vegan cheese that I actually like and so I was excited to try their new shreds, which were tasty, melty and perfect for pizza (and a baked pasta dish I’ll blog about later).
Vegan Mexican Pizza
Ingredients:
1 pizza dough
1/2-3/4 cup salsa
1 portobello mushroom cap, thinly sliced and sauteed
1 small onion, thinly sliced and sauteed
1/2 bell pepper, thinly sliced and sauteed
1/2 cup defrosted frozen corn or fresh
1/2 cup black beans, rinsed and drained
2 tablespoons pickled jalapenos
1 cup vegan cheese shreds
Directions:
Preheat your pizza stone in a 550F oven for 30 minutes. Roll out your dough and top with salsa, veggies, beans, corn, jalapenos and cheese shreds. Place on the pizza stone and bake for 8-10 minutes until browned and bubbly.
To serve top with a sprinkle of baby arugula or shredded lettuce, fresh chopped tomatoes, more pickled jalapenos and vegan sour cream.
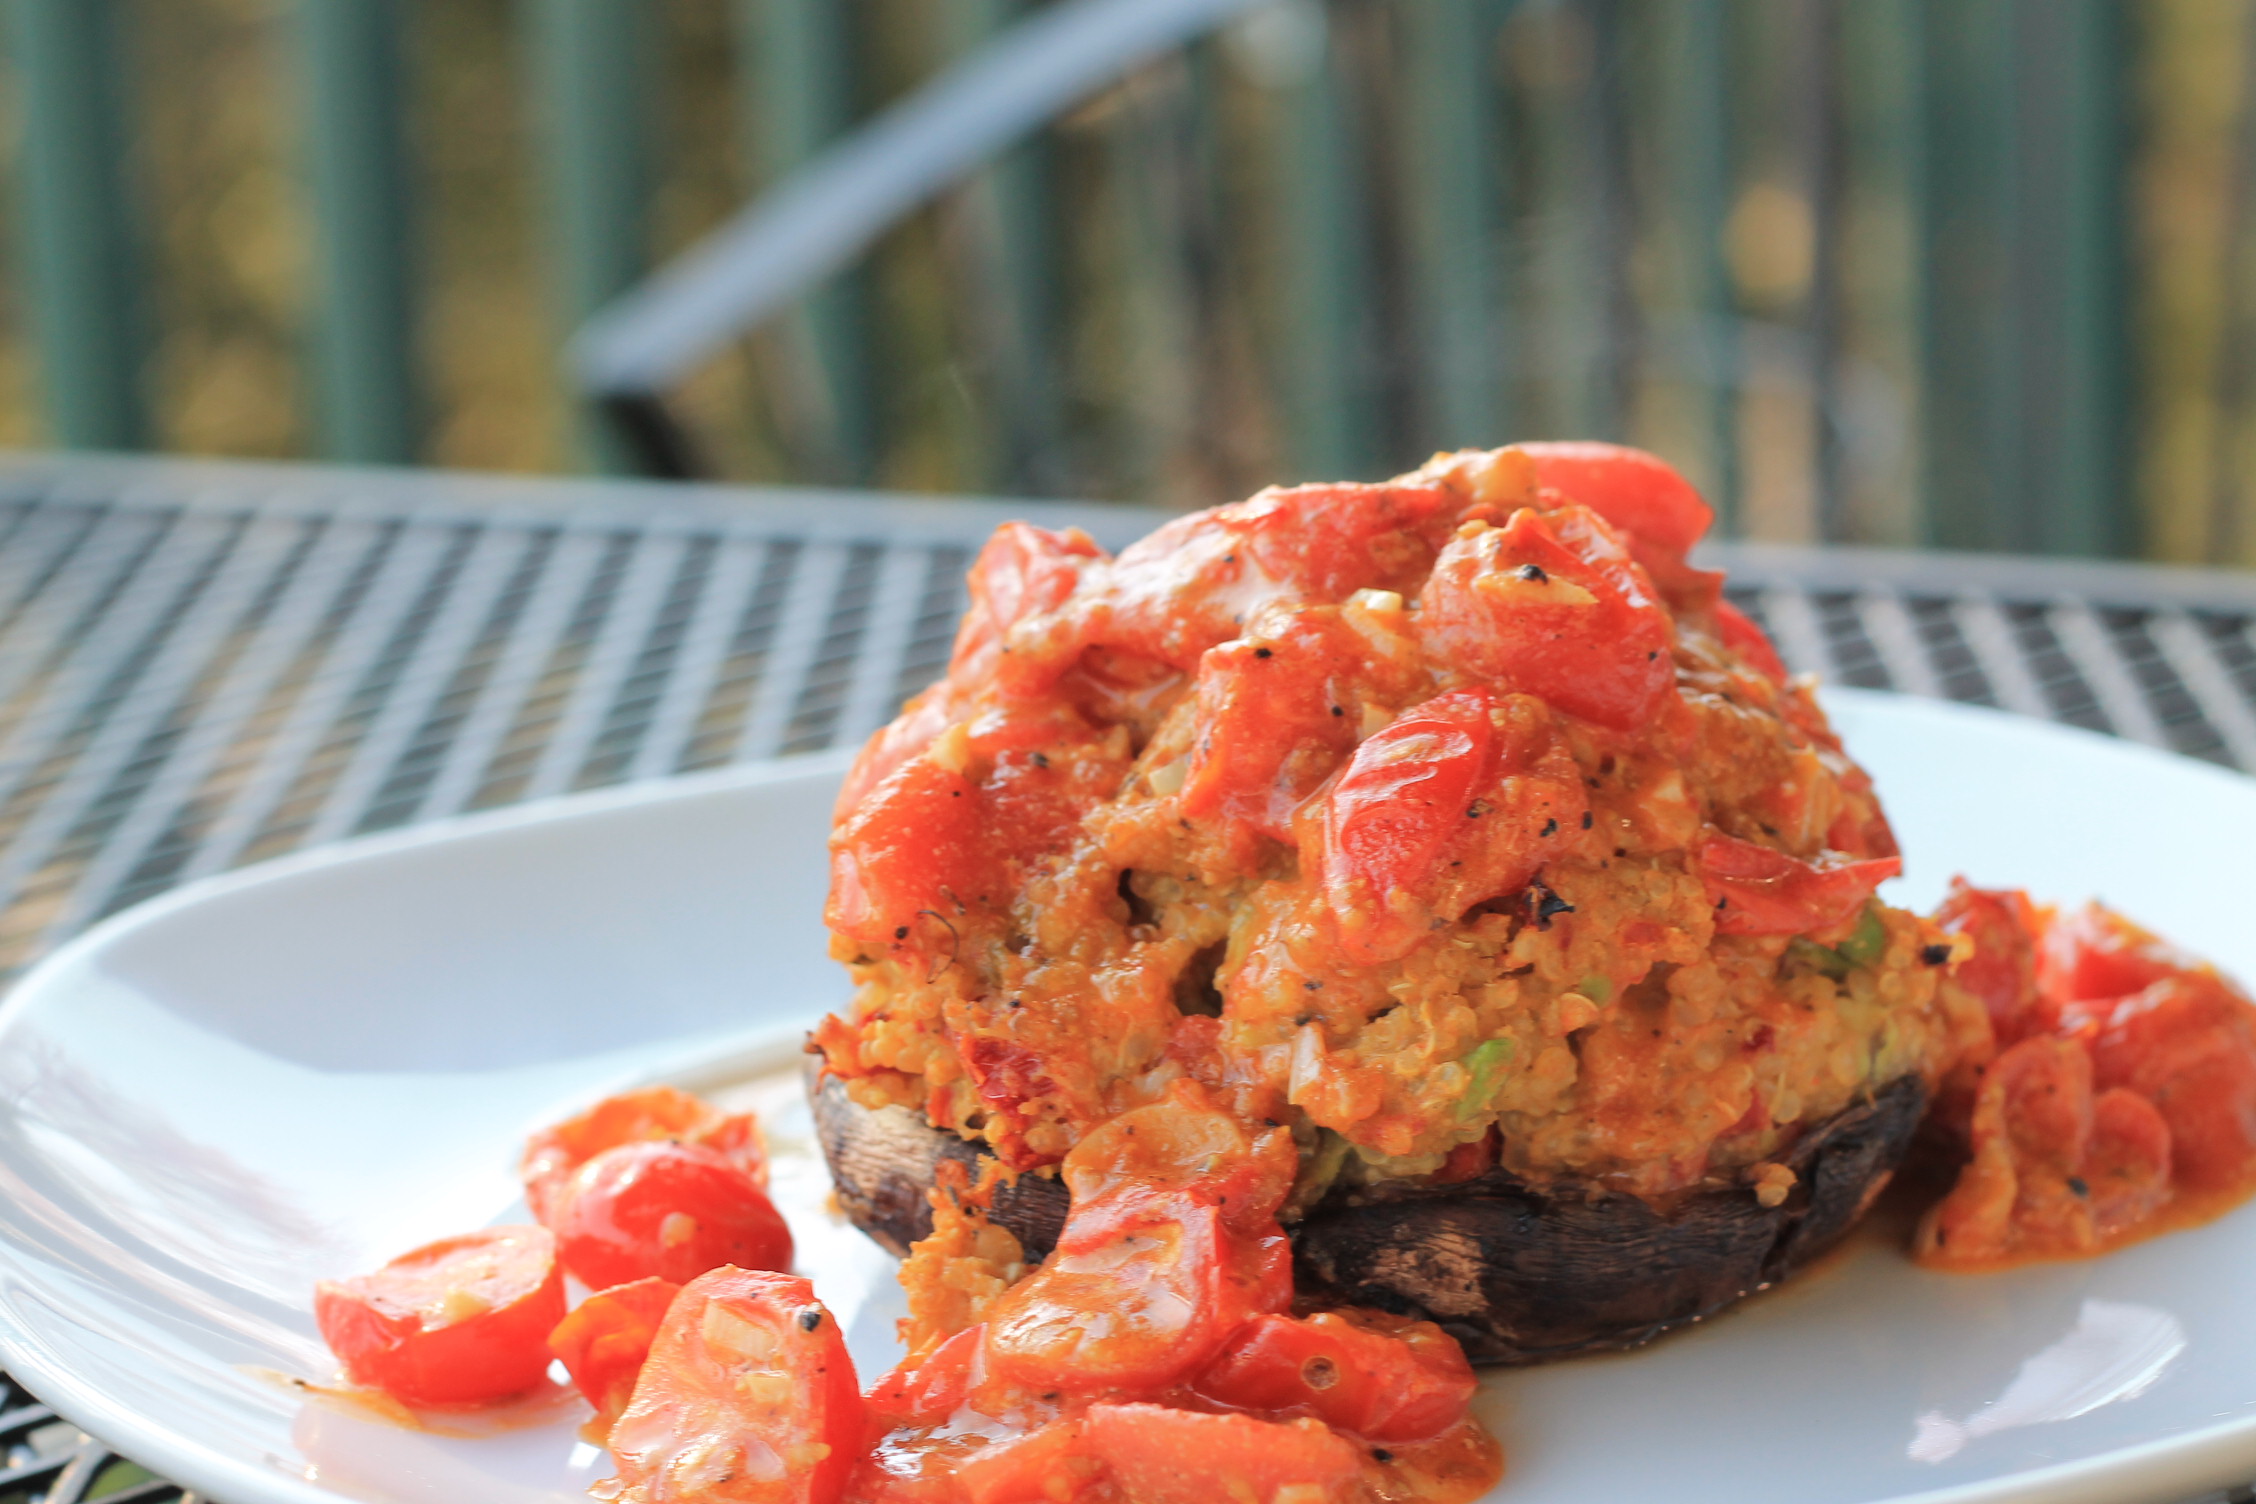
This past weekend was so busy for us that I decided to keep things simple and yet tasty in the kitchen. I had picked up a few portobello mushroom caps at the market on Friday with the intention of making portobello “burgers” but we ended up not having the other fixings (buns, lettuce, large tomatoes, ect) to really make a good burger so I decided to stuff them. The stuffing is a mish-mash of a bunch of things we had in the fridge and in the end this turned out to be a really tasty dish. I made these as entree sized portions but the stuffing would also be great in small button mushrooms as an appetizer.
Serves 2-4 (depending on how much stuffing you want in each)
2-4 large portobello caps, stems removed
1 avocado
1/3 cup hummus of your choice (I used a roasted red pepper and jalapeno)
1/2 cup of dry quinoa, cooked according to package directions
Salt and pepper, to taste
Cherry Tomato Sauce:
1 tablespoon olive oil
2 cups cherry tomatoes, halved
3 cloves of garlic, minced
1 tablespoon nutritional yeast
Salt and pepper, to taste
Preheat the oven to 375F. Cook the quinoa. While the quinoa is cooking mash together the avocado and the hummus in a medium sized bowl and place the portobellos on a lined baking sheet cap side down. Add the quinoa to the avocado hummus and season with salt and pepper to taste. Fill the portobello mushrooms with the quinoa filling. Drizzle the stuffed mushrooms with a little olive oil and place in the oven to cook for 15-20 minutes, until the mushroom is tender and the filling has set. While the mushrooms bake, heat the olive oil in a saute pan over medium heat. Add the tomatoes and garlic and cook for a few minutes until the tomatoes release their juices. Add the nutritional yeast, salt and pepper. Once the mushrooms are done top with a big spoonful of the tomato sauce. ENJOY!
Last week I mentioned that I was making Chipotle Tostadas from Raw & Beyond for dinner one night. Well I did make Chipotle Tostadas but mine were a little different from the recipe. I didn’t have any dried beans, tomato powder and decided to use large brown rice tortillas instead of sprouted grain. Below is my take on this recipe from Raw & Beyond.
Cover the bottom of a small sauce pan with some of the reserved bean liquid. Heat over medium-high for a minute and then add the onion; cook for 5-6 minutes until soft. Stir in the garlic, salt, cayenne, cumin, and chipotle chiles; cook for 30 seconds. Add the beans, remaining liquid and tomato paste. Bring to a simmer and cook for 5 minutes. Place 2/3 of the bean mixture into a blender or food processor and blend until smooth. Return to the pan and stir to combine. Reduce heat to low.
Heat the tortillas in the oven at 250F until crispy, about 15 minutes. Top each tortilla with 1/4 of the bean mixture, 1/4 of the avocado, 1/4 of the romaine and a big dollop of salsa.
Other great additions are cilantro, vegan sour cream and/or hot sauce.
*I use Eden Organic Kidney Beans because they are preserved in water with kombu. If you are not planning to use Eden Organic beans make sure to rinse and drain your beans. You will also have to use water in replace of the bean liquid.
I don’t know about you but when the weather gets hot I just want a nice refreshing drink, specifically a lemon or limeade. Today it was a high of 85F and my craving for lemonade was sky high. Luckily last night I picked up a bunch of lemons in anticipation for the hot weather and made myself a pitcher of lemonade, but not just any lemonade Maple Lemonade!
The inspiration behind this lemonade is a little spot that Neil and I used to go to when we lived in Montpelier called Langdon Street (unfortunately it is closed now) where we would get Maple Lemonade. Since I have never found it out anywhere else I decided that I would just have to make our own.
Maple Lemonade
1 1/3 cups fresh squeezed Lemon Juice, strained
1/2 cup Grade B Maple Syrup
4 cups Water
Ice for serving
Combine the lemon juice and maple syrup in a pitcher and whisk to combine. Add the water and stir again. Fill a class with ice and pour the lemonade over. Enjoy!